After spending three hours on a gardening forum, you feel even more perplexed than before. Someone is adamant about automated vent openers. Another person recommends a particular brand of heat mat. In some way, a third party built a cedar-framed greenhouse with LED grow lights and an irrigation timer and referred to it as a “beginner setup.” It is perhaps the most obvious example of how gardening experts tend to overcomplicate things for beginners than anything else.
It is easier to understand the reality. Mini greenhouses are simply controlled air pockets that surround your plants; they are calmer than the wind, warmer than the outside, and sufficiently protected to extend a growing season. That’s all I have to say. It does not require engineering expertise, unlike a research facility. However, you must truly master a few fundamentals, since it is when these are neglected that things go wrong.
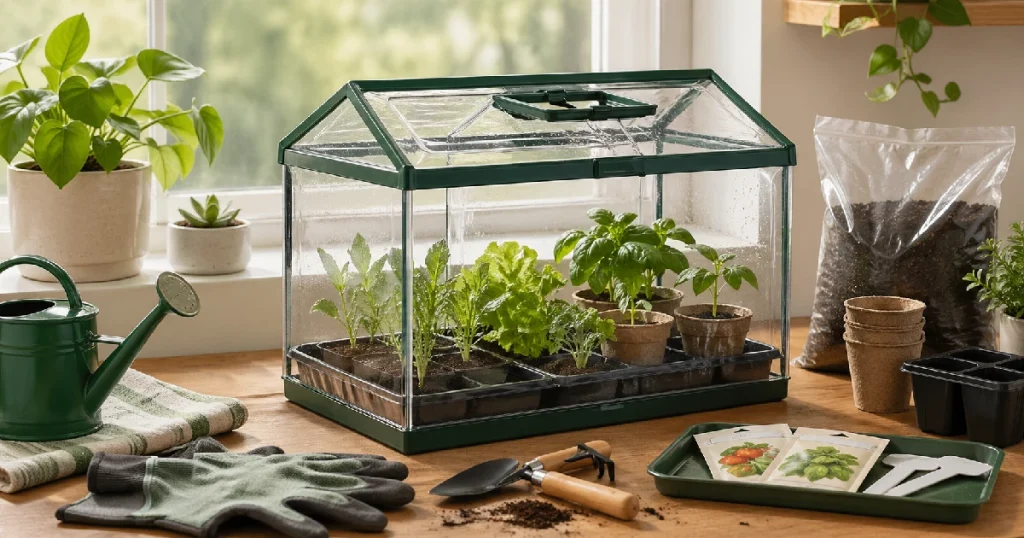
Let’s begin with the actual structure. For a novice, a portable greenhouse with a tubular steel frame and a zippered PVC or PE cover is almost perfect. They are less expensive, lighter, and easier to assemble than flat-pack bookshelves. Covering seedlings prevents pests from treating them like open buffets, traps warmth, and blocks frost. Try to find a PVC model with a reinforced cover since the less expensive ones can tear in the wind. Anchoring is the second thing novices undervalue.
Tiny greenhouses are aerodynamically inefficient. On a windy afternoon, they resemble tumbleweeds and kites. Just watching one barrel cross a garden and land in a hedge is amusing. When assembling, use whatever materials are available, such as cinder blocks, heavy rocks, or stakes, rather than adding them later. Looking back, it seems obvious.
Once you commit to a location, it’s more difficult to change it later. Beginners are unaware of how important location can be. It is important to expose the garden to at least six hours of direct sunlight per day, preferably with an east or south-facing orientation. It is especially beneficial to place plants east-facing so that they receive morning sunlight, which warms the interior early in the morning and allows them to produce more throughout the day. Make sure to avoid areas that remain shaded until mid-afternoon or garden corners that flood after rain. Although many novice growers don’t realize how much placement affects what’s actually possible inside the structure, experienced growers view it as the most crucial decision made before a single seed is planted.
Then there’s the temperature issue, which is both fascinating and worrying. A mini greenhouse can reach 37°C on a moderately warm day when the outside temperature is only 19°C. That type of heat kills seedlings very quickly, and it happens much more quickly than you might expect. Digital or analog thermometers must be installed inside the greenhouse. You use it to determine when to act. In the spring and summer, keeping an eye on it every day becomes second nature if you have one to begin with.
Many novices ignore ventilation until something goes wrong, yet ventilation is the ability that connects everything. Typically, opening the zippered front panel on warm or sunny days is sufficient for a small setup – free, quick, and convenient. A novice overseeing a few shelves of seedlings will have no problem ventilating manually, but larger greenhouses benefit from automatic vent openers. Develop the habit of checking the thermometer in the morning, opening the door if it’s rising, and closing it again at night. The rhythm takes around three days to become automatic.
The physical puzzle is completed by starter pots and seed trays. When using a 3-tier or 4-tier kit, taller, sun-loving plants should be placed near the top, while younger or shorter seedlings should be placed farther down. Lettuce, spinach, kale, basil, parsley, and early tomatoes are ideal starter crops. Producing something edible doesn’t require precise environmental control, and they’re forgiving and grow fast enough to provide a sense of progress.
| Topic | Key advice | Common mistake | Priority |
| Structure | Choose a tubular steel frame with a reinforced PVC or PE zippered cover — cheap, light, and easy to assemble. | Buying a thin, unreinforced cover that tears in wind. | Essential |
| Anchoring | Secure with cinder blocks, heavy rocks, or stakes before use — mini greenhouses act like kites in wind. | Skipping anchoring until the greenhouse blows away. | Essential |
| Location | Pick a spot with 6+ hours of direct sun, ideally east- or south-facing, away from shade and flooding corners. | Placing in a shaded or waterlogged spot without checking sun hours. | Essential |
| Temperature | Install a thermometer inside — temps can hit 37 °C on a mild 19 °C day, killing seedlings fast. | Not monitoring temperature until seedlings die. | Essential |
| Ventilation | Open the zip panel on warm or sunny days; close at night. Check the thermometer every morning. | Ignoring ventilation until plants overheat or mold appears. | Essential |
| Plant placement | Put taller, sun-loving plants on top shelves; shorter or younger seedlings lower down. | Placing light-hungry plants on the bottom shelf in shade. | Good practice |
| Starter crops | Begin with lettuce, spinach, kale, basil, parsley, or early tomatoes — forgiving and fast-growing. | Starting with demanding or slow crops before gaining experience. | Good practice |
| Extra equipment | Heat mats and grow lights are situational — only add them once you understand your setup’s actual needs. | Buying heat mats, grow lights, and extra staging before the first season. | Avoid over-buying |
Buying more than a first setup actually needs is becoming more and more tempting, especially online. In extremely cold early spring weather, heat mats are useful, but as temperatures rise, they become less effective. If the greenhouse is in a sunny location, grow lights are unnecessary, but if there are no windows, they make sense. Even though extra shelving and elaborate staging might seem appealing, the kit already includes enough. If anything is lacking, spend a season with the fundamentals, learn how the structure functions in your particular area, and then determine what needs to be done.
The most skilled gardeners began simply and gradually added skills. Overengineered setups tend to produce the worst results before a single plant is successfully grown in them. Small greenhouses with a thermometer, a few seedling trays, and adequate ventilation are not compromises. The setup is complete, and for most beginners, it’s all they need.
As a Senior Editor at Mini Greenhouse Kits, Hannah Kinsley is a passionate supporter of small-space gardening and urban gardening. Hannah, who is currently majoring in Environmental Policy through the University of Michigan’s Environmental Studies program, infuses her writing with a solid academic foundation and a sincere enthusiasm for the environment. You can find her playing soccer or exploring the city’s green areas with friends when she’s not researching the newest trends in city gardening or creating content for minigreenhousekits.com.